


Overview
- What is Route 53?
- Route 53 Configuration with CloudFront
Objective
Our objective for this blog is to map the CloudFront URL with Route 53 so that we can access the site from the custom domain name.
Pre-requisites
[Part 2 — CloudFront Configuration of Cloud Resume Challenge
Overviewmedium.com](https://medium.com/@U_N_R_3_A_L/part-2-cloudfront-configuration-of-cloud-resume-challenge-3a91a56edad4 "medium.com/@U_N_R_3_A_L/part-2-cloudfront-c..")
- Follow the above blog to set up CloudFront.
- Domain name of your choice (I have purchased the domain name from Go Daddy)
- Hosted Zone created in Route 53
What is Route 53?
Amazon Route 53 is a scalable and highly available domain name system offered by AWS. Think of it as the digital address book of the internet, translating user-friendly domain names into IP addresses that computers use to identify each other. Whether launching a new website, managing domain names, or ensuring the health of your applications, Route 53 provides a suite of tools to streamline these processes.
Key Features:
- Domain Registration: Easily register and manage domain names directly through Route 53. The process is seamless, allowing you to focus on building your online presence without the hassle of dealing with multiple providers.
- DNS Routing: Efficiently route end-user requests to your applications, websites, or resources, whether hosted on AWS or elsewhere. Route 53 ensures low latency and high-performance DNS responses.
- Health Checking: Monitor the health of your applications and resources by setting up health checks. Route 53 can automatically redirect traffic to healthy resources if an endpoint is unhealthy, optimizing uptime and user experience.
- Traffic Policies: Implement advanced traffic management strategies with traffic policies. Distribute traffic across multiple resources based on weights, latency, or geographic location, providing flexibility and control.
Use Cases:
- Web Hosting: Host your websites and applications on AWS or other platforms while efficiently managing DNS records through Route 53.
- Global Content Delivery: Leverage the global network of AWS edge locations to deliver content with low latency. Route 53 intelligently directs users to the nearest available resource.
- Disaster Recovery: Implement failover configurations to ensure continuous availability. If one endpoint becomes unavailable, Route 53 can seamlessly redirect traffic to a healthy resource.
Route 53 Configuration with CloudFront
Step 1: Add the following code to your template.yaml file
MyRoute53Record:
Type: "AWS::Route53::RecordSetGroup"
Properties:
HostedZoneId: Your Hosted Zone ID
RecordSets:
- Name: Your Custom Domain Name
Type: A
AliasTarget:
HostedZoneId: Z2FDTNDATAQYW2 # only for us-east-1
DNSName: !GetAtt MyDistribution.DomainName
HostedZoneId: Your Hosted Zone ID: Replace "Your Hosted Zone ID" with the actual ID of your Route 53 hosted zone. This is the unique identifier for the hosted zone in which you want to create the record sets.RecordSets: This is an array of DNS record sets to be associated with the specified hosted zone.Name: Your Custom Domain Name: Replace "Your Custom Domain Name" with the actual domain name for which you want to create the DNS record.Type: A: Specifies the type of DNS record. In this case, it's an 'A' record, which is used to map a domain or subdomain to an IPv4 address.AliasTarget: Specifies an alias target for the DNS record. Alias records are used to map your domain to specific AWS resources.HostedZoneId: Z2FDTNDATAQYW2: Replace this value with the appropriate Hosted Zone ID for your specific AWS region. The provided value corresponds to the Hosted Zone ID for CloudFront distributions in theus-east-1region.DNSName: !GetAtt MyDistribution.DomainName: This references the domain name of a CloudFront distribution namedMyDistribution. It uses the!GetAttfunction to retrieve theDomainNameattribute of the CloudFront distribution, and this DNS name becomes the target of the Route 53 alias record.
Key Points:
- This code creates a Route 53 record that routes traffic to a CloudFront distribution.
- It uses an alias record to achieve this, providing flexibility in routing.
- It’s important to replace placeholders with actual values and consider region-specific settings.
Step 2: Check the output
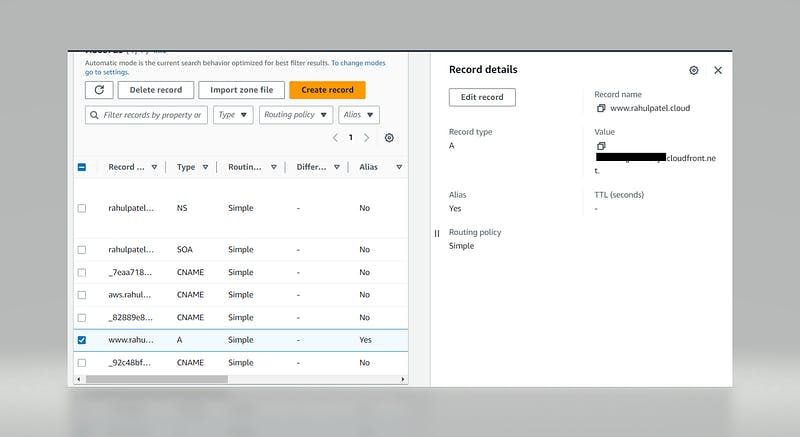
- The above screenshot shows the record created using the above code.
- Open your custom domain in a new tab and check the result, It should show the content of our static website.
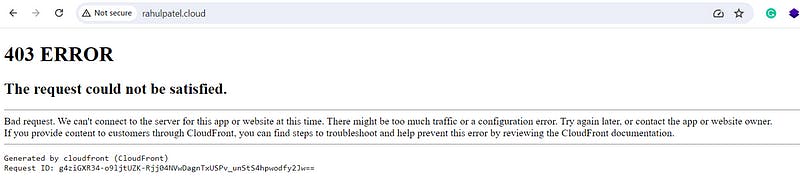
- It will give a 403 error and it is happening because the CloudFront distribution we created is not allowing the Route 53 record However we created it.
- We need Cloudfront to allow that Domain name to be called through CloudFront Distribution and We will figure that out in the next blog.
If this post was helpful, please follow and click on the clap 👏 button