

After the end of this blog, you will be able to deploy your project on Kubernetes using the CI-CD pipeline.
First, we will understand the requirement
- The team of developers working on new features will merge their code to a GitHub repo.
- As soon as the code reaches GitHub, using a CI (Continuous Integration) pipeline, setup in Jenkins, automated builds will be triggered
- The automated builds will frequently deploy new features to the production website
- Every build will prepare a Dockerfile and push docker images to docker-hub
- Every docker image will be deployed (Continuous Deployment) to a Kubernetes cluster.
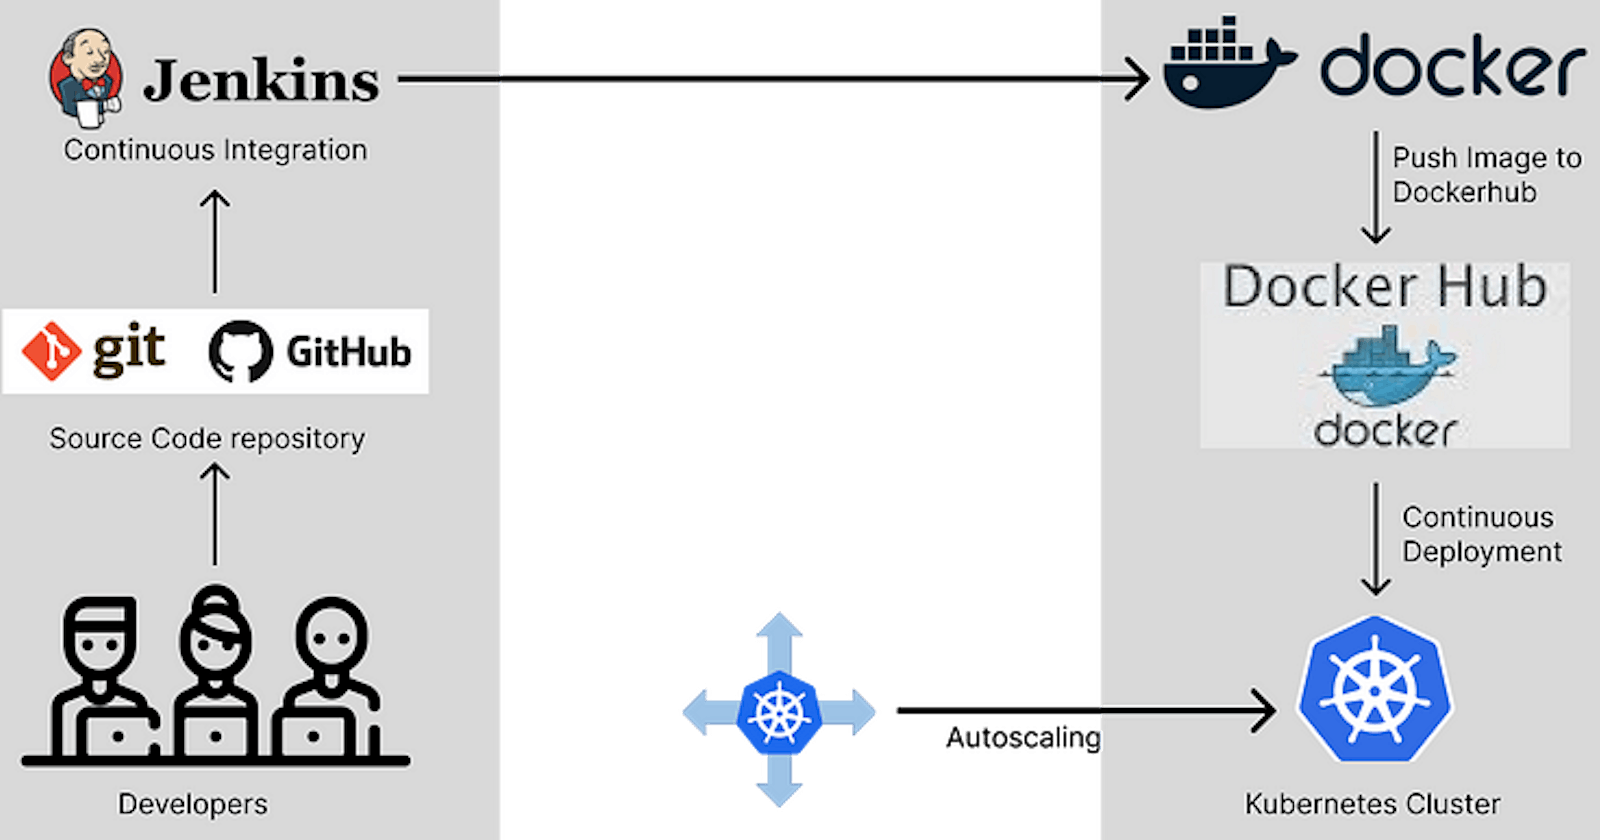
So now let’s make the architecture of our application. This will represent the workflow of the CI-CD pipeline.
- Developer to push code on the Source code repository
- Jenkins to fetch the code and build the docker image
- Push Docker image to Dockerhub
- Kubernetes to pull the same image from Dockerhub and deploy it to Kubernetes Cluster
Fork the following GitHub repo to your GitHub account
[GitHub - Patelrahul4884/cicd-pipeline-train-schedule-autodeploy: Train Schedule sample app for…
You can't perform that action at this time. You signed in with another tab or window. You signed out in another tab or…github.com](https://github.com/Patelrahul4884/cicd-pipeline-train-schedule-autodeploy "github.com/Patelrahul4884/cicd-pipeline-tra..")
Jenkins setup
- Install required plugin
Pipeline, Pipeline: API, Kubernetes, Docker, Docker Pipeline
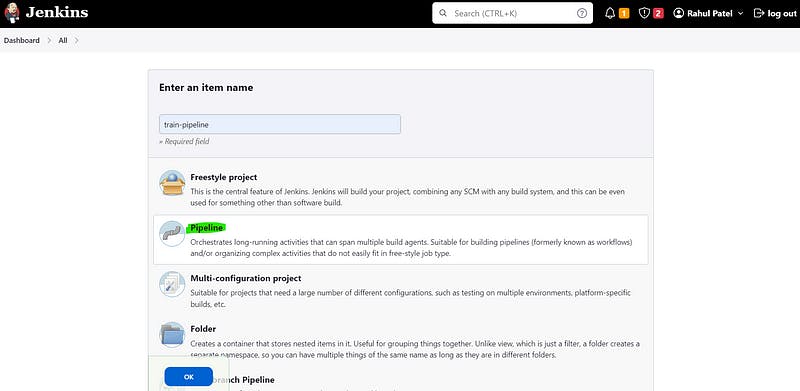
Enter the item name and select Pipeline and click Ok
Select the Github Project and add the github repo link

Select Poll SCM and add * * * * * star (that means it will check the repo every 2 mins and if there is any change then It will start the build automatically)

Find the Jenkinsfile in the project folder and Paste the code in a Script section of Pipeline

pipeline {
agent any
environment {
//be sure to replace "DOCKER_IMAGE_NAME" with your own Docker Hub username
DOCKER_IMAGE_NAME = "rahul4884/train-schedule"
}
stages {
stage("Checkout from github repo"){
steps{
# Replace with your github repo
git url: 'github.com/Patelrahul4884/cicd-pipeline-tra..
}
}
stage('Build') {
steps {
echo 'Running build automation'
sh './gradlew build --no-daemon'
archiveArtifacts artifacts: 'dist/trainSchedule.zip'
}
}
stage('Build Docker Image') {
steps {
script {
app = docker.build(DOCKER_IMAGE_NAME)
}
}
}
stage('Push Docker Image') {
steps {
script {
docker.withRegistry('registry.hub.docker.com', 'docker_hub_login') {
app.push("${env.BUILD_NUMBER}")
app.push("latest")
}
}
}
}
stage('DeployToProduction') {
steps {
kubeconfig(caCertificate: 'LS0tLS1CRUdJTiBDRVJUSUZJQ0FURS0tLS0tCk1JSUMvakNDQWVhZ0F3SUJBZ0lCQURBTkJna3Foa2lHOXcwQkFRc0ZBREFWTVJNd0VRWURWUVFERXdwcmRXSmwKY201bGRHVnpNQjRYRFRJeU1USXdOREUwTXpZME5sb1hEVE15TVRJd01URTBNelkwTmxvd0ZURVRNQkVHQTFVRQpBeE1LYTNWaVpYSnVaWFJsY3pDQ0FTSXdEUVlKS29aSWh2Y05BUUVCQlFBRGdnRVBBRENDQVFvQ2dnRUJBTVV4CnR2eFdmcmNGV2crVFpxSi92U3pWRFlPSVVMWE0zMlRxOW9TL1g5UzZVVjNkZ0xUTDI4V0IvblF0K0xGbjNwWEQKOE9RNTZVN25sZlhiSWI0Q1ZUdVVkVDg0c2xGcVdWN2lkUVlGNXVNaERDamF2MW16OG9IbVJQVXlBVW9HQWY5VApWWUFxY3h2VnVvbDVKa1EydXpyTHJrZ1VJU2k3dVdYdlVxRnl4bW8rUWt2cWRiUm5ldDBpbHNTbU5FdDlObTNTClVJSStrbTRZU3lod2xtTHlOYXJPc0lsNVU3ZXpuUG1Ua0E0MXN1ZG4wSjNRMXBYQUdSY2NqVXVzWjBIK3FyZm4KOGJWdFpuMmhsbms0VHRMSGhEUS81MFNXOCt1MEVLOHo2Sms5bHVET1BiSjdxam11U0Y1c3RJUDg1VWo2SndhMgpoUm1sclU1UUlzSTd5ZWlFMzZFQ0F3RUFBYU5aTUZjd0RnWURWUjBQQVFIL0JBUURBZ0trTUE4R0ExVWRFd0VCCi93UUZNQU1CQWY4d0hRWURWUjBPQkJZRUZQcFhkVmc3LzJiUGhBZytZdys4WFIzWk90OUJNQlVHQTFVZEVRUU8KTUF5Q0NtdDFZbVZ5Ym1WMFpYTXdEUVlKS29aSWh2Y05BUUVMQlFBRGdnRUJBR2IwcEEwQythVFVDdytOY1FyZgp3NHNhQStUMnNMU0xTM3NGOWh1NEdKU0lHaXdPTDRja2pscE1sUTE5aDltWnVpdVBkOEhNa0RrWTBTRHQvRXdyCm94MVdrYTlxMkFEZ0hyVCtDUzBOWHVJMDBLQ0QzdDd5czBhdGl6b21lWnppcE9aYkZRdnI2eEU0bUhQY0hNQUEKQ1dMR2RvRjNhVEZFODJIUWxLWkM4anFHUklqeE5SWlFpZ1IvVXlxSktYZWs1Z1BQZGVzckJRY2NuQzVtVWxoOQo0cktwT1p0UTBjajFMakx2dkQxNWdCMkVSVzBtK2lDTUhCM1g1SGJXdkZWOEgzOEFzcjc5amwrMHFoU1lRTTVoCmsweVNxd3gvY2hFd0hWc0NURjNKSUZUejAwZVhFa0VPdE1yVitYWEhKNk9jdzFINXFvNFhHY0NoUDN2c3NZbFMKUWw0PQotLS0tLUVORCBDRVJUSUZJQ0FURS0tLS0tCg==', credentialsId: 'kubernetes', serverUrl: 'https://192.168.59.104:8443') {
// some block
sh 'kubectl apply -f deployment.yaml'
sh 'kubectl apply -f app-service.yaml'
sh 'kubectl rollout restart deployment train-schedule'
}
}
}
}
}
Dockerhub setup
Follow this path and add Dockerhub Credential

Select Username and Password

To Generate the password go to your docker hub account
In the security, section add the New Access Token and Paste it into the password

Note: Id should be as written in Jenkins script
Here in the Jenkins script, it is docker_hub_login
MiniKube setup
First, make sure that Minikube is up and running by typing minikube start command
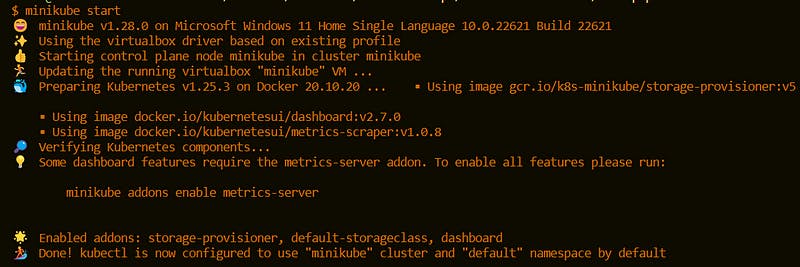
minikube status

Everything is up and running
kubectl cluster-info
to get the IP of the cluster and copy the URL

Paste the URL into kubeconfig function of the script

Configure Clouds
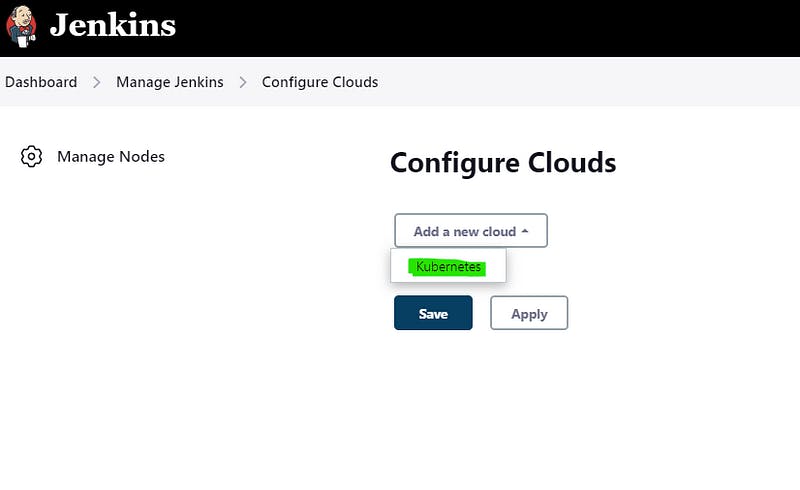
Manage Jenkins -> Manage Nodes and Clouds -> Configure Clouds
Click on Add a new cloud, you will see Kubernetes in the dropdown
Note: If you are not seeing Kubernetes then you are missing the Kubernetes plugin
You will see the following screen after Selecting Kubernetes
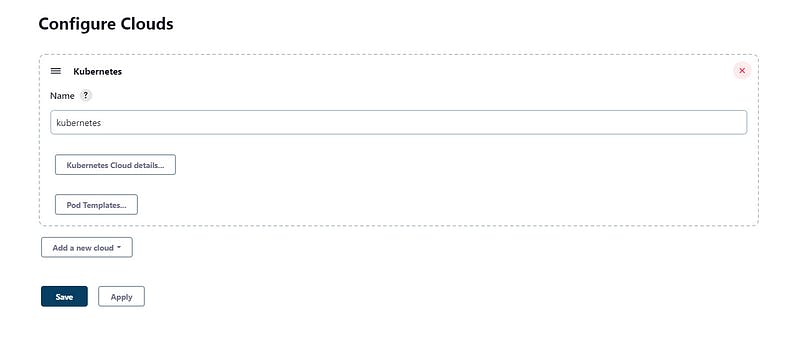
Select Kubernetes Cloud details
Scroll down and you will see the credential option
Add -> Jenkins
The following screen will pop up

Kind: Secret file
Choose the config file which is located at C:\Users\patel\.kube
Note: Where patel is the username of my system
Id: kubernetes (because we have configured it in the script file)
And now Add the connection and Test connection
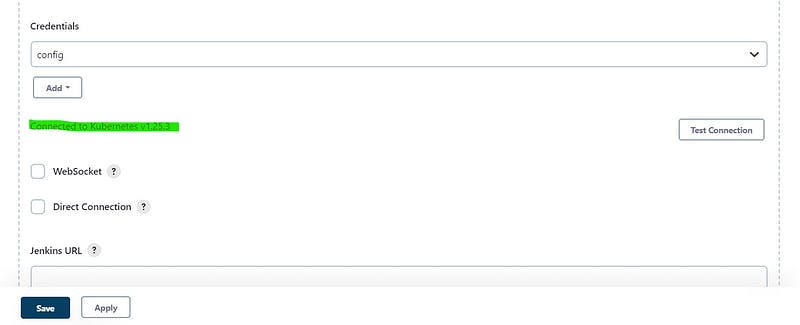
Minikube is connected with Jenkins.
Now one final thing that we need to add is caCertificate
To get this you need to follow C:\Users\patel\.minikube
Here, you will find a file called ca.crt

Copy the file content and paste it into caCertificate of the script file
Now we are all set to build the project.
Before running the project make sure that your Docker Desktop and Minikube are up and running
Click on Build now

It will take some time to complete the process.

All green and our app is deployed to Kubernetes Cluster.
Too see the application type below command.
minikube service list

Copy the URL and Paste it in the browser.

Your application is up and running now.
Now make any changes and push the changes to Github, Jenkins will automatic detect the changes and start the build.
Conclusion
Finally we have successfully deployed the application to Kubernetes Cluster with the help of GIthub, Jenkins, Docker and Dockerhub. We have deployed this project locally so other people can’t use it but we can do that as well using AWS and my next blog will be on that. Let me know in the comment section if you face any issue.