Getting Started with Application Load Balancer (v2)


Application Load Balancer: An Introduction
An Application Load Balancer is a type of Load Balancer that operates at the application layer, the seventh layer of the Open Systems Interconnection (OSI) model. It is a highly available and scalable service provided by cloud providers like Amazon Web Services (AWS) that enhances the performance, reliability, and security of your applications.
Why Use an Application Load Balancer?
Improved Performance: An Application Load Balancer distributes incoming traffic across multiple targets, such as EC2 instances, containers, or IP addresses, to ensure that no single target is overwhelmed. This improves the performance of your application and reduces the risk of downtime.
Enhanced Reliability: An Application Load Balancer monitors the health of your targets and automatically routes traffic away from targets that are unhealthy or unavailable. This enhances the reliability of your application by reducing the risk of downtime.
Increased Security: An Application Load Balancer integrates with other AWS security services, such as Amazon Virtual Private Cloud (VPC), to provide an additional layer of security for your application. You can also use SSL/TLS encryption to secure data in transit between clients and targets.
How Does an Application Load Balancer Work?
An Application Load Balancer operates at the application layer and uses the hostname and path information in the incoming request to route traffic to the appropriate target. It also supports content-based routing, which allows you to route traffic based on the contents of the request, such as the URL or headers.
Once the Application Load Balancer routes traffic to a target, it uses health checks to monitor the health of the target and ensure that it is able to handle the traffic. If a target becomes unhealthy, the Application Load Balancer will automatically route traffic away from that target to prevent downtime.
Benefits of Using an Application Load Balancer
Improved User Experience: An Application Load Balancer helps improve the user experience by distributing traffic across multiple targets and ensuring that the application is highly available and responsive.
Reduced Costs: An Application Load Balancer can reduce costs by automatically scaling the number of targets up or down based on demand, reducing the need for manual intervention.
Increased Agility: An Application Load Balancer allows you to quickly and easily deploy new applications and services without the need for complex network configurations.
Application Load Balancer - Hands-on
We are going to practice launching the load balancer but first, we need to send traffic to something so we are going to launch EC2 instances.
Follow the blog I have written to lunch the EC2 instance and lunch two EC2 instances.
https://medium.com/@U_N_R_3_A_L/deploy-your-first-website-on-the-ec2-instance-d67dcc9bbacc


As you can see two EC2 instance is created and I can see the web page.
So what we want to have is one URL to access both instances to balance the load between both instances and we can make it happen by using a load balancer.
Follow - EC2 -> Load Balancing -> Create load balancer -> Select Application load balancer
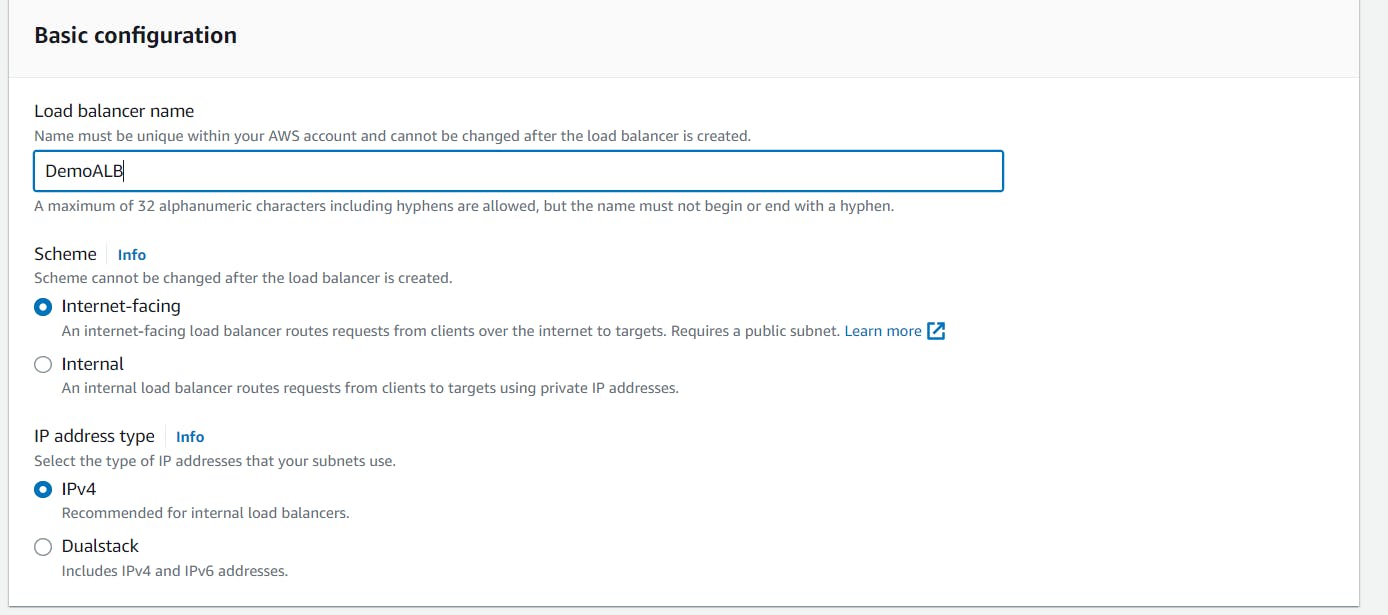
In the basic configuration enter the name of your Load balancer and leave the other field as default.
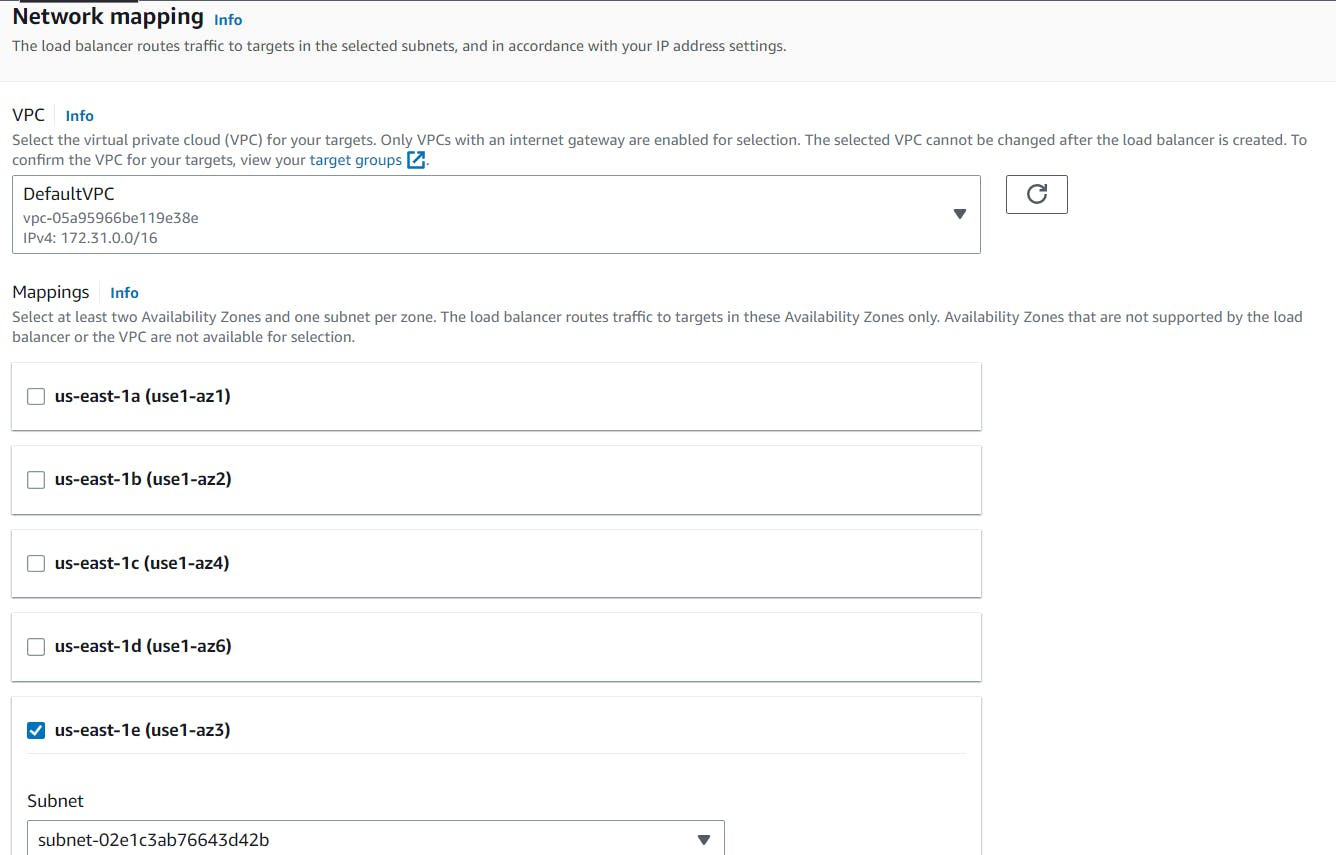
Select VPC and Availability Zone as per your requirements.
Note: Select the Availability Zone that you created while launching the EC2 instance otherwise it will throw a 500 status code error
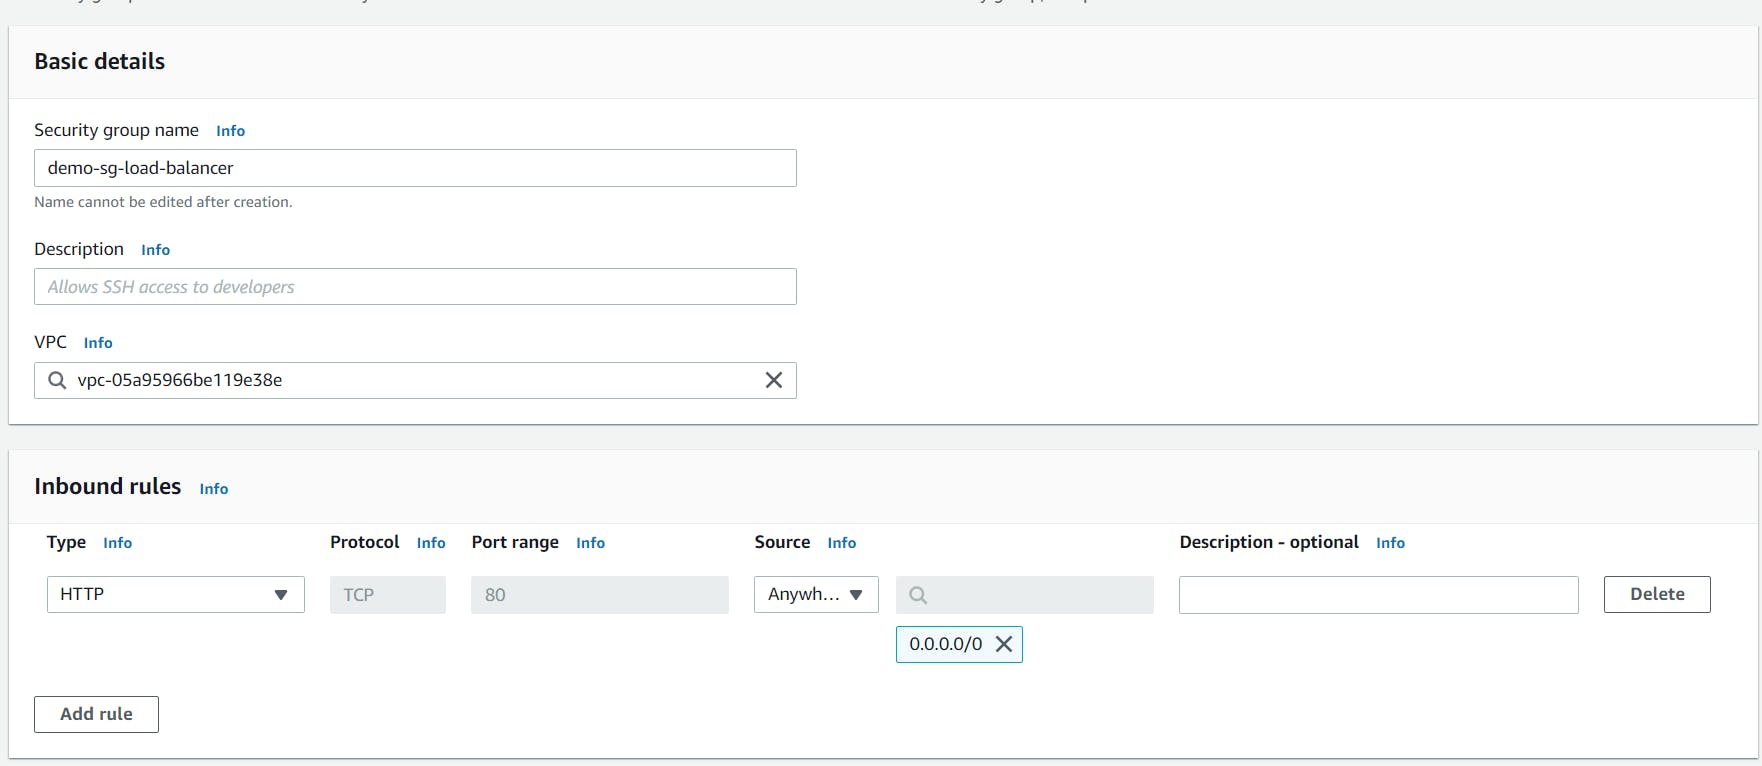
In Security, groups Create new security group with the following details. allows HTTP requests from anywhere
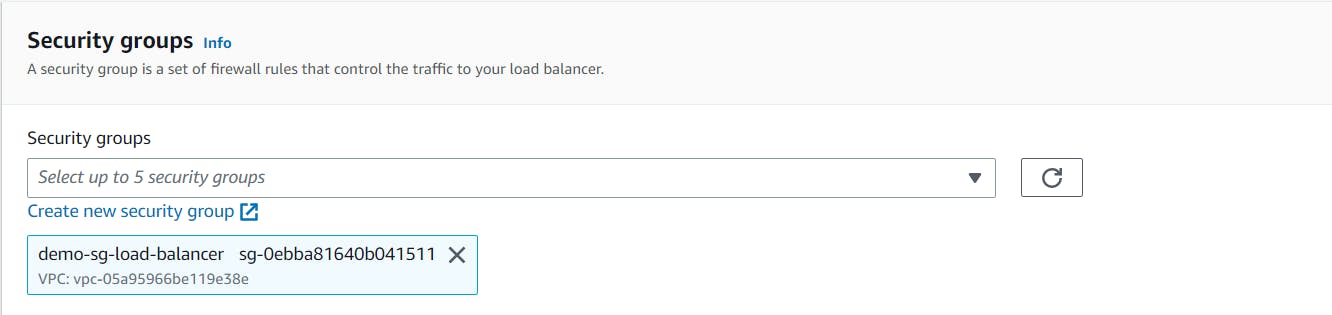
After creating of Security group come back to the load balancer page and refresh the security group and select the one we created.
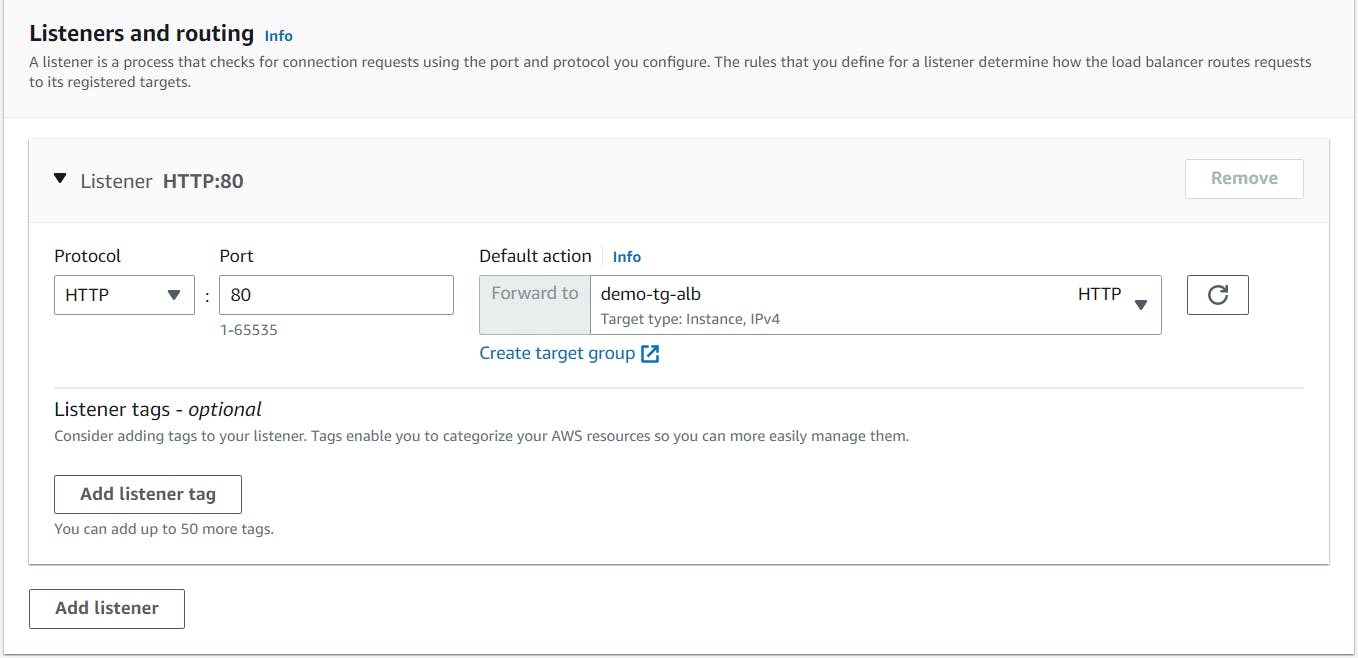
In Listeners and routing Create target group and the target group is the group of EC2 instances.
While creating a target group enter the name of the target group and leave all the fields as default and click on next.
Now you can see Register targets on this screen you have to select the instance you want to target. we will add both EC2 instances we created.
Select both instances and click on include as pending below button and click on create target group button.
Now you can see the target group is selected. and final step click on create load balancer button. It will take some time to Provision the Load balancer.

Now Load balancer is created and the state is also active. Copy the DNS name and paste it into the browser. and it will display the webpage. try to refresh multiple times and the IP will get changed which means the target is changing that is because the load balancer is redirecting between both EC2 instances.
Congratulations!! you have now successfully configured the Application load balancer.
Now let's have look at a few more advanced concepts for our load balancer. and number one is around network security.
Network security of load balancer
Currently, we access this load balancer through a security group of the load balancer and then we access our EC2 instances through their own security group. so if you go to the public IP address of any EC2 instance and you can still access the EC2 instance directly. It should not happen like this, we should only be able to access the EC2 instance via the load balancer, so how we are going to fix this?
Go to the security group of EC2 instances
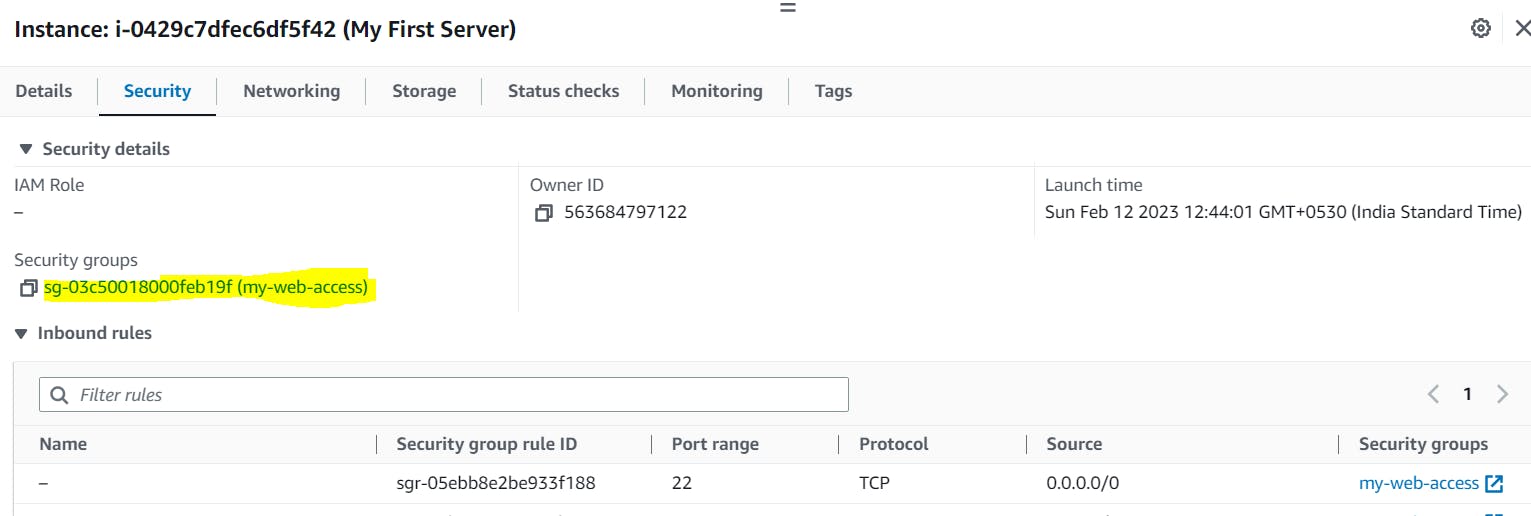
Click on Edit inbound rules.
Right now, we are allowing everything from everywhere on this security group but we're gonna say that no, the only traffic allowed to our EC2 instance should be traffic coming from the load balancer.
Delete the HTTP type rule and add a new rule.
A new rule should be the type of HTTP and Source should be from the load balancer
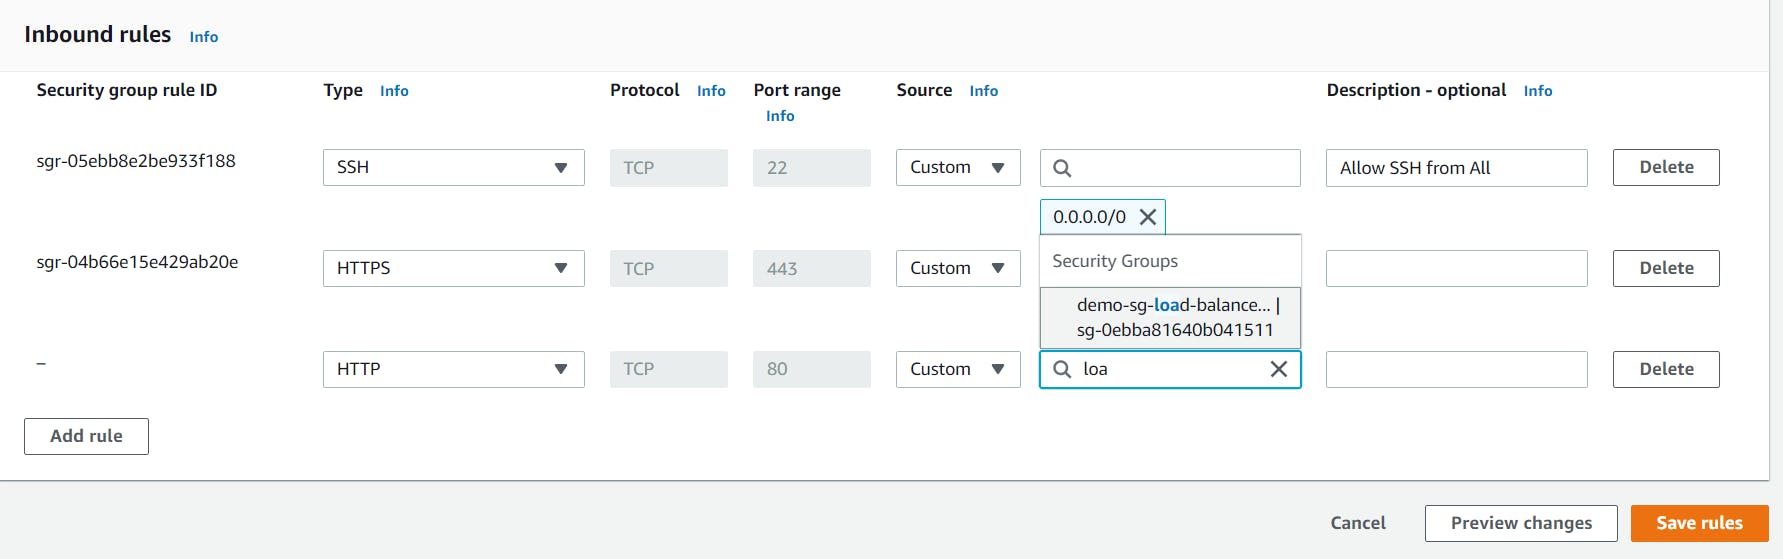
Select the load balancer security group and save the rules.
So now if we try to access the EC2 instance directly, we will not be able to access it because it only allow the traffic from load balancer security group.

If you check the load balancer URL and you will still be able to access it.
So that's it for the load balancer, we have seen a couple of advanced features. I hope you liked it.
Conclusion
In this blog, we have covered the basic theory of Application load balancer and then we configured it in AWS and also discovered a few advanced features of it.
Do follow me on medium for similar content. and don’t forget to share. 💻